Last week I had to set up an Azure File Share for data transfer purposes. Clients will upload data to the Azure File Share and the data will then be moved from the share to a local drive by a PowerShell script. The PowerShell script gets invoked every 15 minutes by a Scheduled Task.
The setup worked as expected but during the first tests a problem occurred. The script could not access the Azure File Share, that got mounted before with PowerShell. Opening a new PowerShell console and accessing Azure File Share worked fine; even if starting PowerShell as administrator. It seems that the Scheduled Task gets executed under a different security context even if the specified user account gets used when running the task. I solved the problem by mounting the Azure File Share (if not yet mounted) in the script using credentials from a configuration file.
In the next sections I’ll explain how I set up the Azure File Share and the Scheduled Task and how the Azure File Share gets mounted in the data transfer script.
Azure File Share
To create an Azure File Share I just followed the official documentation.
- Create a storage account
- Create a file share in Azure Files
After creation the Azure File Share can be mounted in Windows with File Explorer, Command Prompt or PowerShell (for details see Mount an Azure File share and access the share in Windows). I mounted the Azure File Share under the actual user with PowerShell and could successfully access the share using File Explorer and PowerShell.
PowerShell Script for Data Transfer
First the connection credentials to mount the Azure File Share have to be exported to a configuration file.
- Open PowerShell console as administrator
- Create a credential object (Username and password according section
Mount the Azure File share with File Explorer of Mount on Windows) and export the credential to a configuration file
$cred = Get-Credential;
$cred | Export-Clixml C:\PATH\TO\DataTransferConfig.xml;
In the data transfer script itself the credential can then be loaded using the following code snippet.
$azureCredential = Import-CliXml $PathToConfigFile;
The $PathToConfigFile can either be specified in the script itself or can be passed to the script via a parameter.
Now the Azure File Share can be mounted in the script using the following code, where $unc contains the path to the Azure File Share (i.e \\servername\azure-file-share-name).
if (!(Test-Path -Path $unc))
{
    New-PSDrive -Name "Y" -PSProvider "FileSystem" -Root $unc -Credential $azureCredential -Persist;
}
Scheduled Task
Last but not least the Scheduled Task, that executes the data transfer script, has to be created.
- Open
Task Scheduler
- Create new task
Action > Create Task...
- General Settings
- Enter Name
- Select
Run wheter user is logged in or not
- Tick
Run with highest privileges

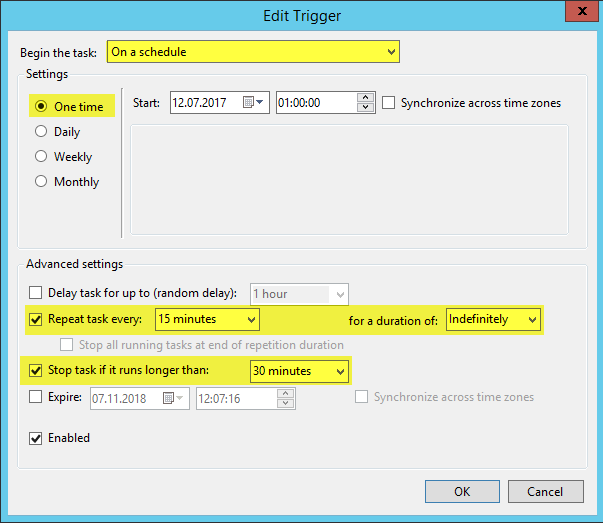
- Create new trigger

- Create new action

Add arguments: -ExecutionPolicy RemoteSigned C:\PATH\TO\Move-Data.ps1 -PathToConfigFile C:\PATH\TO\DataTransferConfig.xml

I'm a software engineer working at isolutions AG