Prerequisites

The following requirements have to be met for creating a build job for a C# project.

  • Running TeamCity instance (Setup manual can be found here)
  • MS Build Tools have to be installed on the host (download)
  • MS Test Tools have to be installed on the host (download)

Important: Restart the build agent after the installation of the MS Tools

Basic build job setup

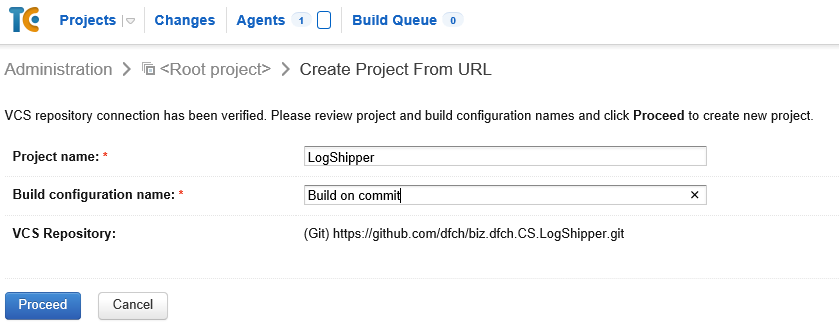
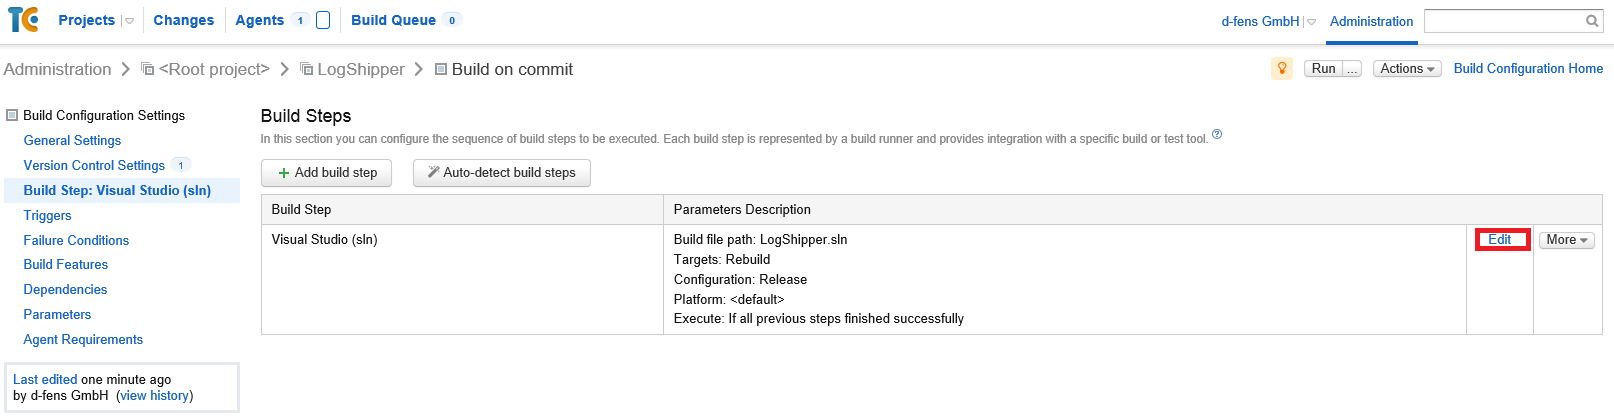
This section describes the basic setup of a build job for a C# project on a TeamCity server. The LogShipper project, which is available on GitHub, will be taken as a sample project.

  1. Log in to your TeamCity server and go to the Administration board
  2. Click Create project from URL
    TeamCity_build-job_1
  3. Select the parent project, enter the repository URL and the repository credentials
    TeamCity_build-job_2
  4. Define the project and build config names
    TeamCity_build-job_3
  5. Next, TeamCity will scan the source code and try to auto detect some build steps
  6. Choose the desired build steps out of the recommendations
    TeamCity_build-job_4
  7. The build steps can now be configured by clicking on edit
    TeamCity_build-job_5

Add build step for unit tests with MSTest

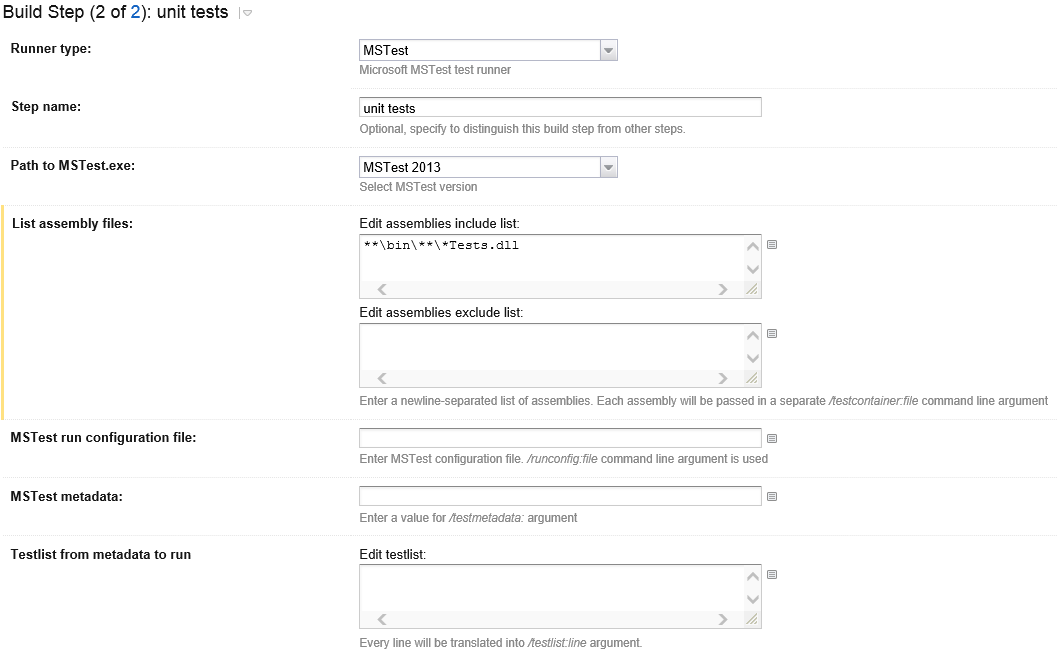
To add another build step for the execution of unit tests perform the following steps

  1. Go to the build configuration of the C#-Project
  2. Navigate to build step and add a new one
    TeamCity_build-job_9
  3. Select MSTest
  4. Configure the unit test build step as desired
    TeamCity_build-job_10

Trigger build on commit to VCS

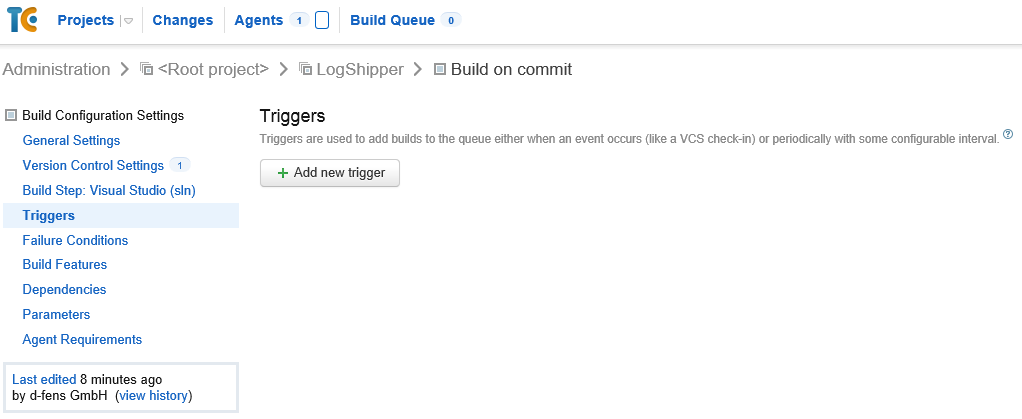
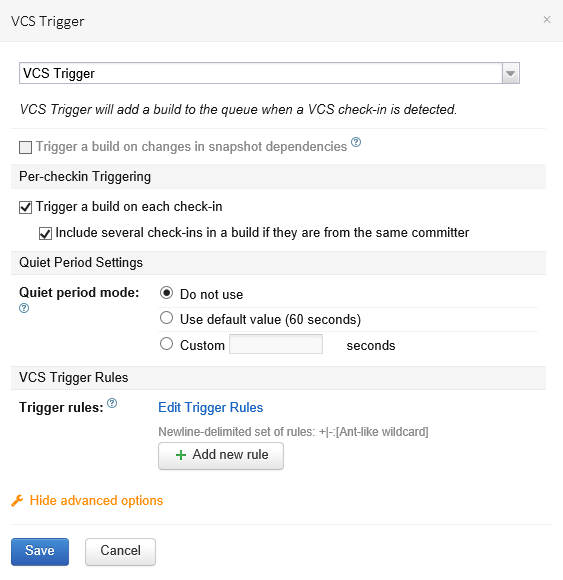
For triggering the build job on every commit to the version control system (VCS) go to your build job/build configuration settings.

  1. Go to Triggers
    TeamCity_build-job_6
  2. Add a new trigger
    TeamCity_build-job_7
    In the trigger configuration popup you can configure as well rules for the trigger like triggering the build only if a specific user commits or not triggering a build if the commit message matches a custom regular expression.

Store and sync configuration with VCS

TeamCity allows to store and its configuration to a VCS. The necessary steps are described below.

  1. Create a repository somewhere (i.e. GitHub or Bitbucket)
  2. Go to the administration board
  3. In Projects menu select the root-project
  4. Go to VCS Roots in left navigation
  5. Create a VCS root for the repository, where you want to store and syncronize the configuration to
  6. Go to Versioned Settings
  7. Select Synchronization enabled and choose the VCS root from the dropdown you created before (Step 5)

icon_TeamCity
The TeamCity Free Open Source License was generously provided by JetBrains

1 Comment »

Leave a Reply

Fill in your details below or click an icon to log in:

WordPress.com Logo

You are commenting using your WordPress.com account. Log Out /  Change )

Facebook photo

You are commenting using your Facebook account. Log Out /  Change )

Connecting to %s

This site uses Akismet to reduce spam. Learn how your comment data is processed.