After playing around with the Office 365/Exchange 2016 REST API I decided to summarize the knowledge and the experiences I gained in this blog post. The goal of the tryout session was to check out the Outlook endpoints for messages and calendars. To be more precise, I wanted to try out the following features.
- Reading messages
- Sending messages
- Reading calendar events
- Creating calendar events
I decided to invoke the REST calls with PowerShell as it’s a simple and easily reproducible way to do so. First of all, I took care about authentication. To use the Office 365/Exchange 2016 REST API you need to use OAuth2 authentication. Instead of including username and password as a header in each request like in Basic Authentication, an OAuth2 token will be sent in the headers of each request to the server. The OAuth2 token expires after an hour. To avoid expiration, the token can be renewed using a refresh token. To acquire such an OAuth2 token you first have to register an application in Azure AD.
Register an Application in Azure AD
In my case I registered an application for my PowerShell console as follows.
- Login to Azure Portal
- Register application in Azure AD
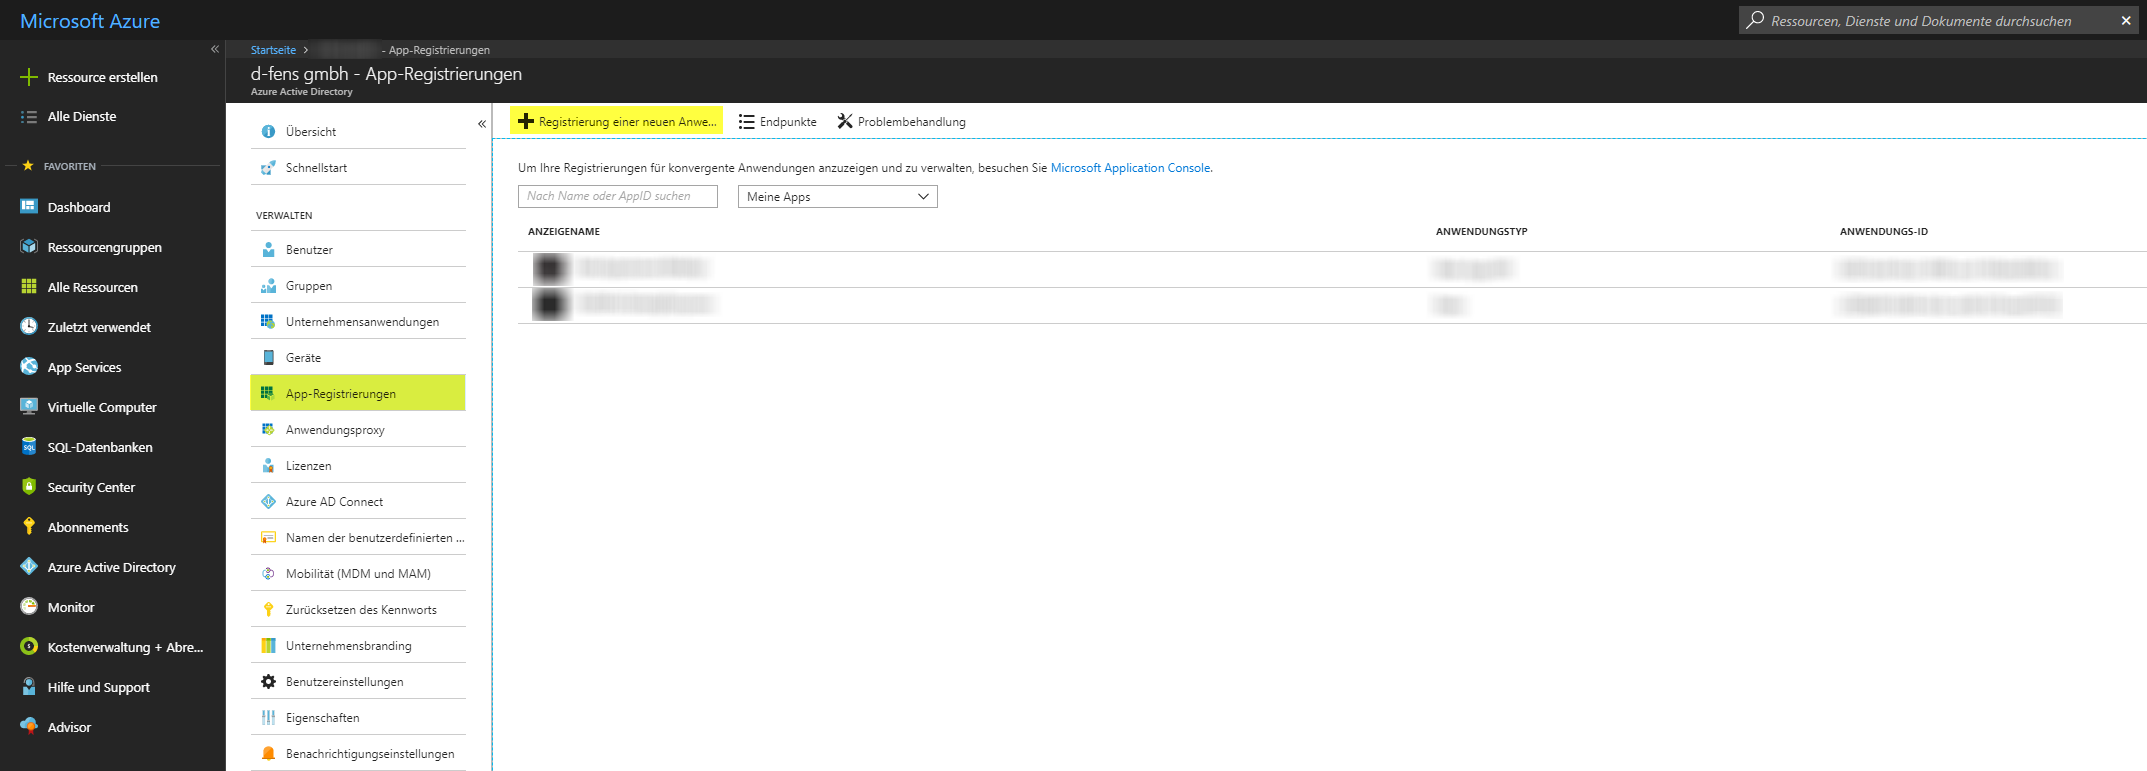
- Select “All Items” in the navigation bar on the left-hand side, search for “directory” and then select “Azure Active Directory” out of the search results

-
Navigate to “App registrations” and add a new application registration by clicking on “+ New application registration”

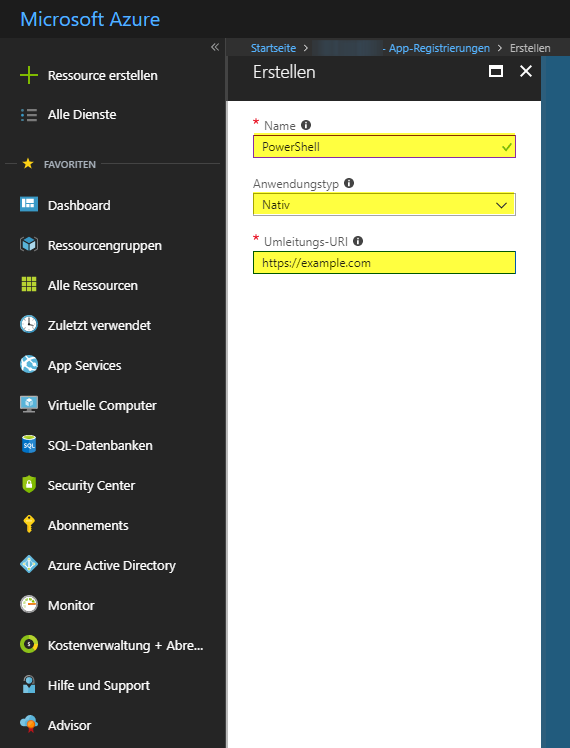
-
Enter name, type and redirect URI of your application (for details concerning redirect URI see here)

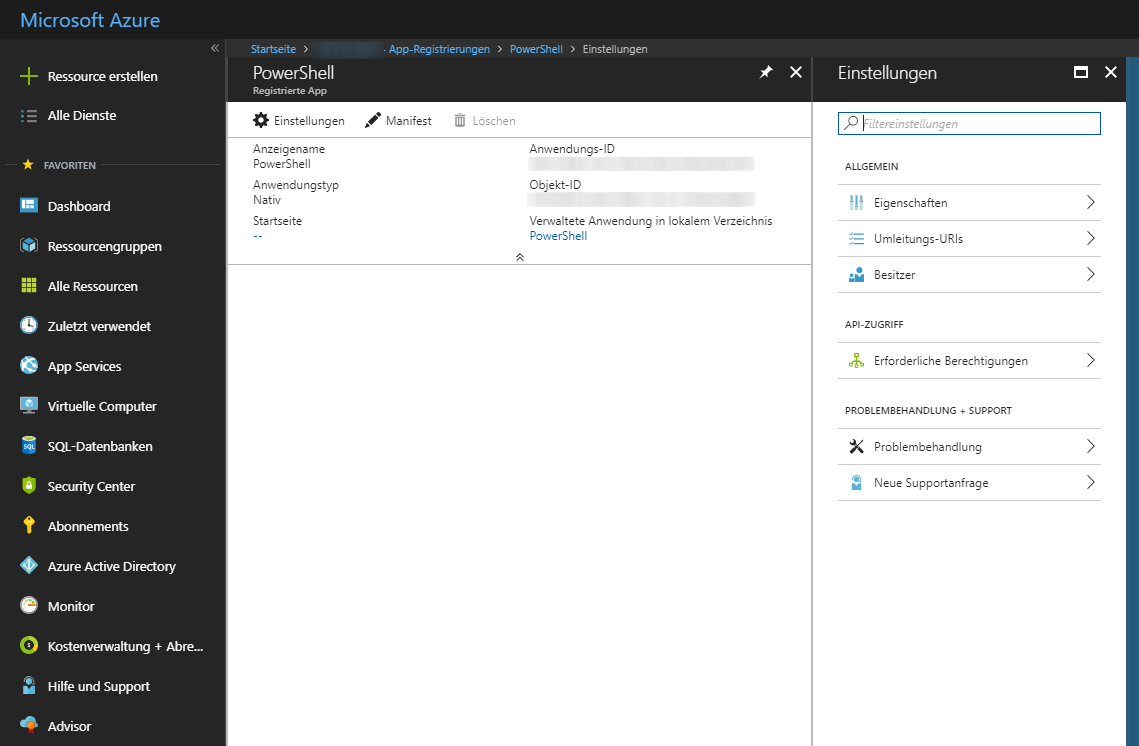
-
Go to the settings of the previously registered application

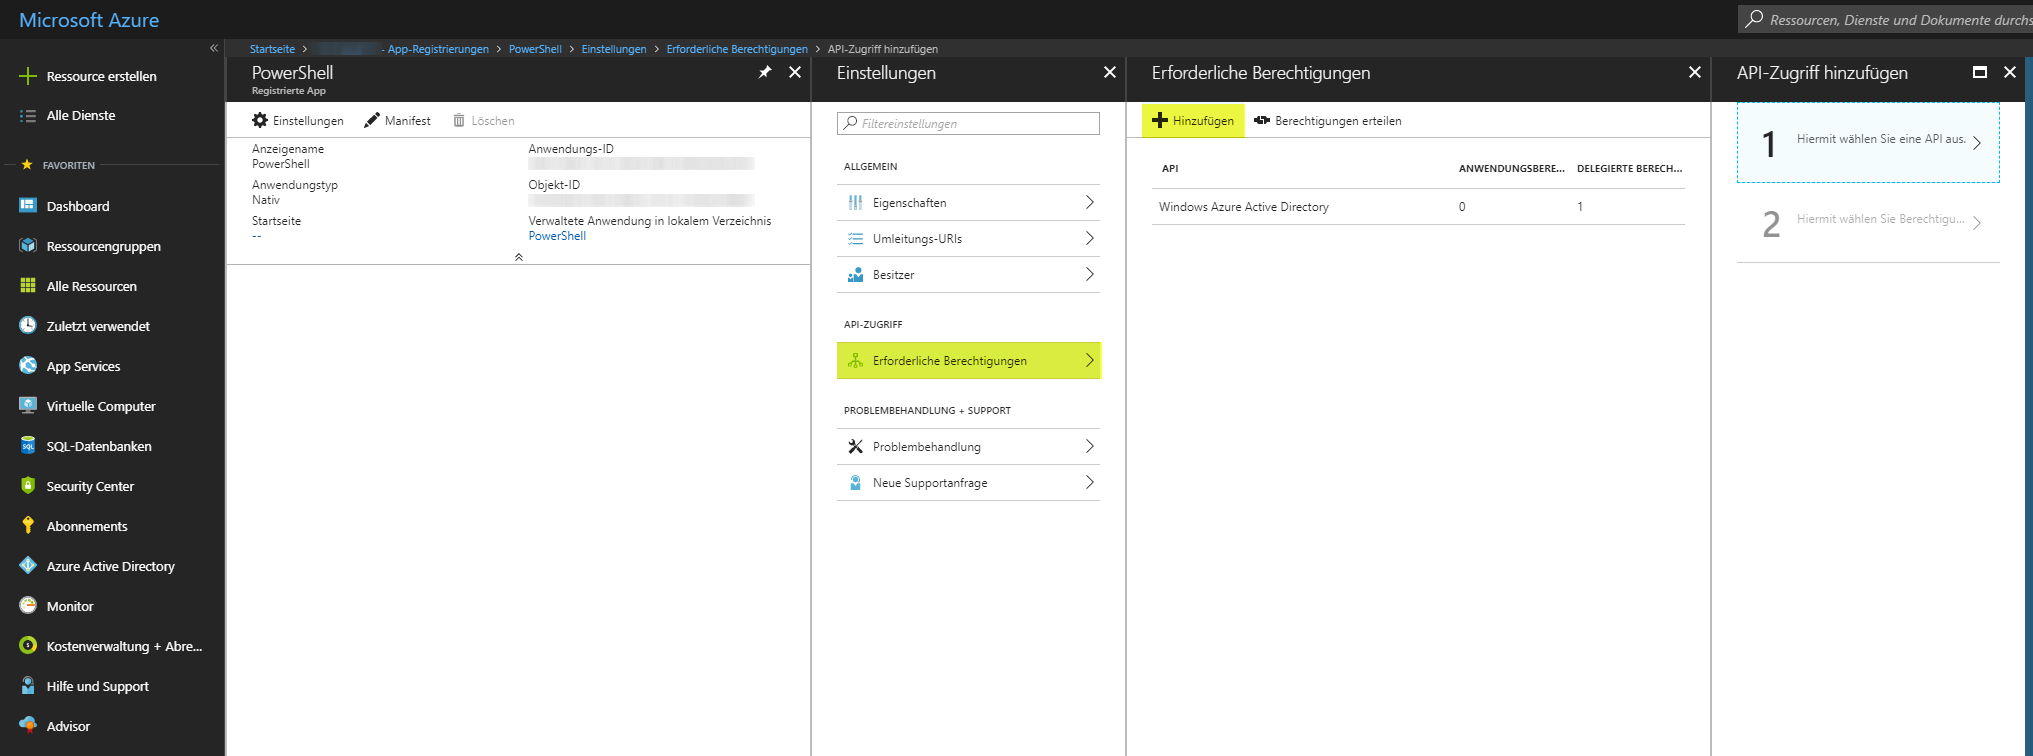
-
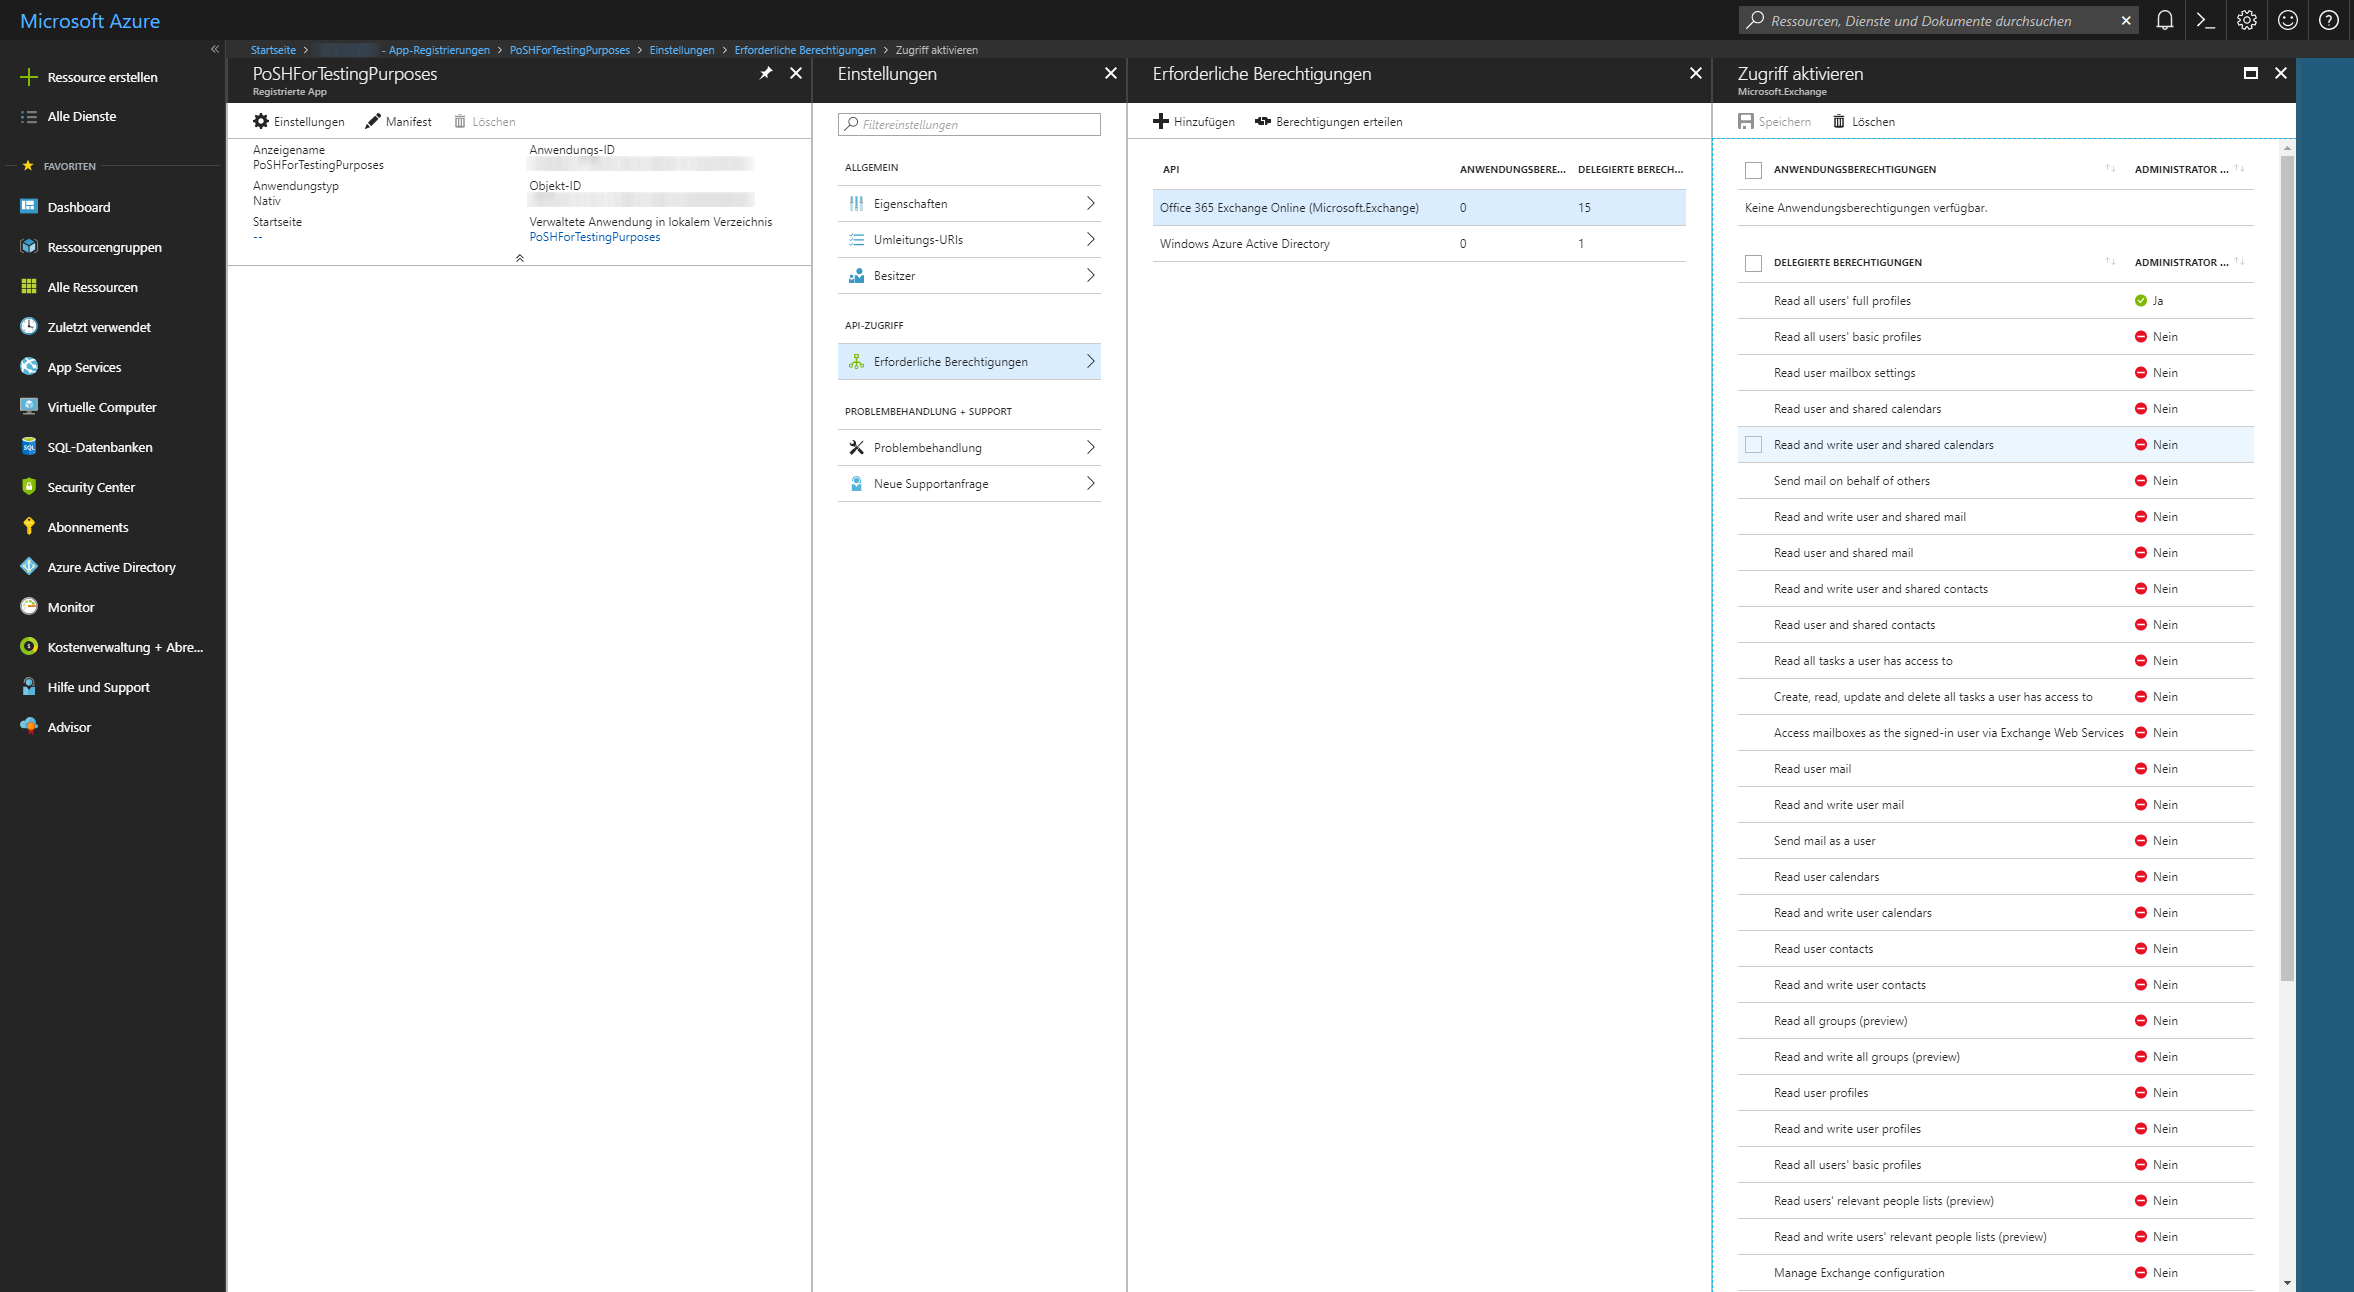
Open “Required permissions” and click “+ Add” to add Office 365 Exchange Online (Microsoft.Exchange) API

-
Select Office 365 Exchange Online (Microsoft.Exchange) API

-
Select the required permissions for your application

That’s it. For more details concerning application registration see here.
Delete Application Registration in Azure AD
During playing around with application registrations I wanted to delete one of my application registrations in Azure Active Directory. Unfortunately by default the delete button is greyed out. To enable the delete button, the application has to be changed to a single tenant application. To do so procceed as follows.
- Select the application registration to be deleted
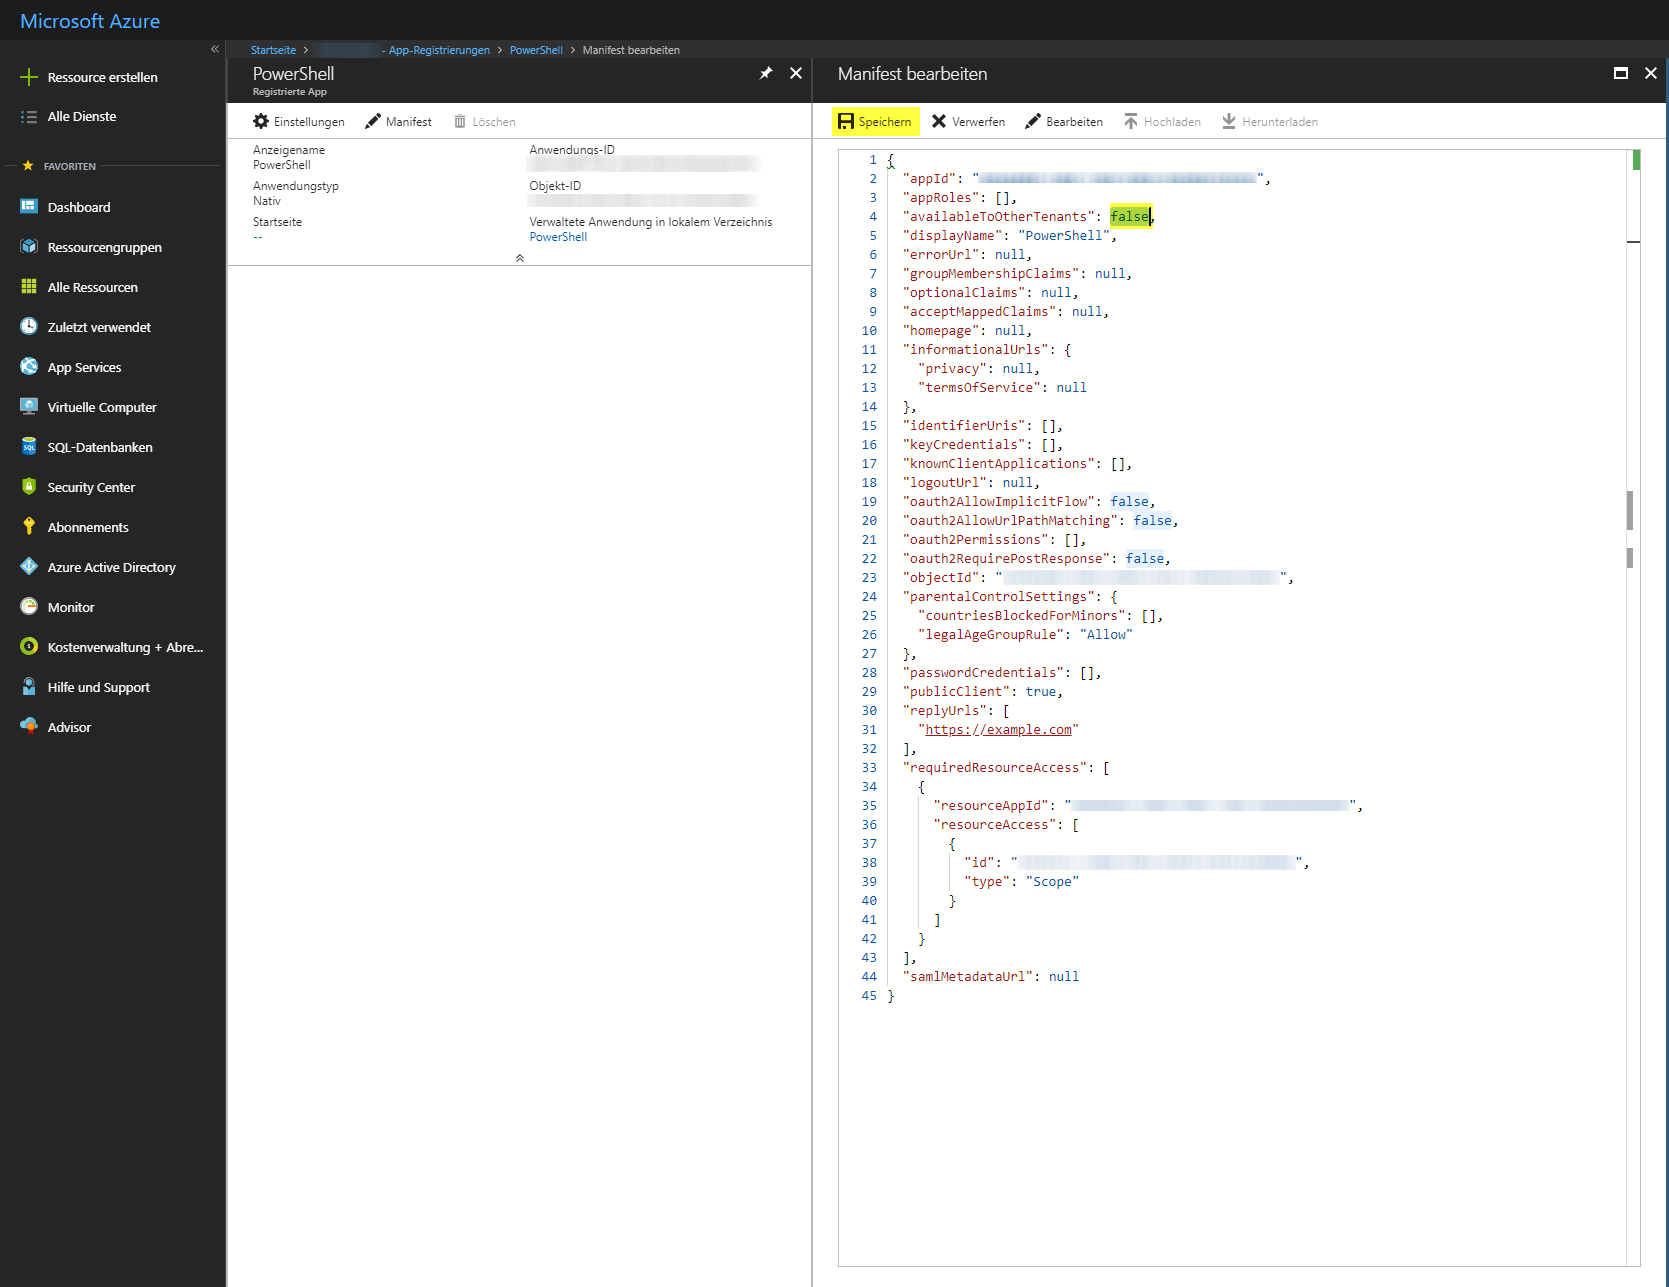
- Open its “Manifest”
- Change
availableToOtherTenants to false

- Save changes
After that the application registration can be deleted.
Request OAuth2 Access Token
To request an OAuth2 access token for the above registered application, first an authorization code has to be obtained.
Request Authorization Code
The authorization code can be obtained by calling the URI below in a browser.
Important: Before calling the URI, replace the following placeholders in the URI.
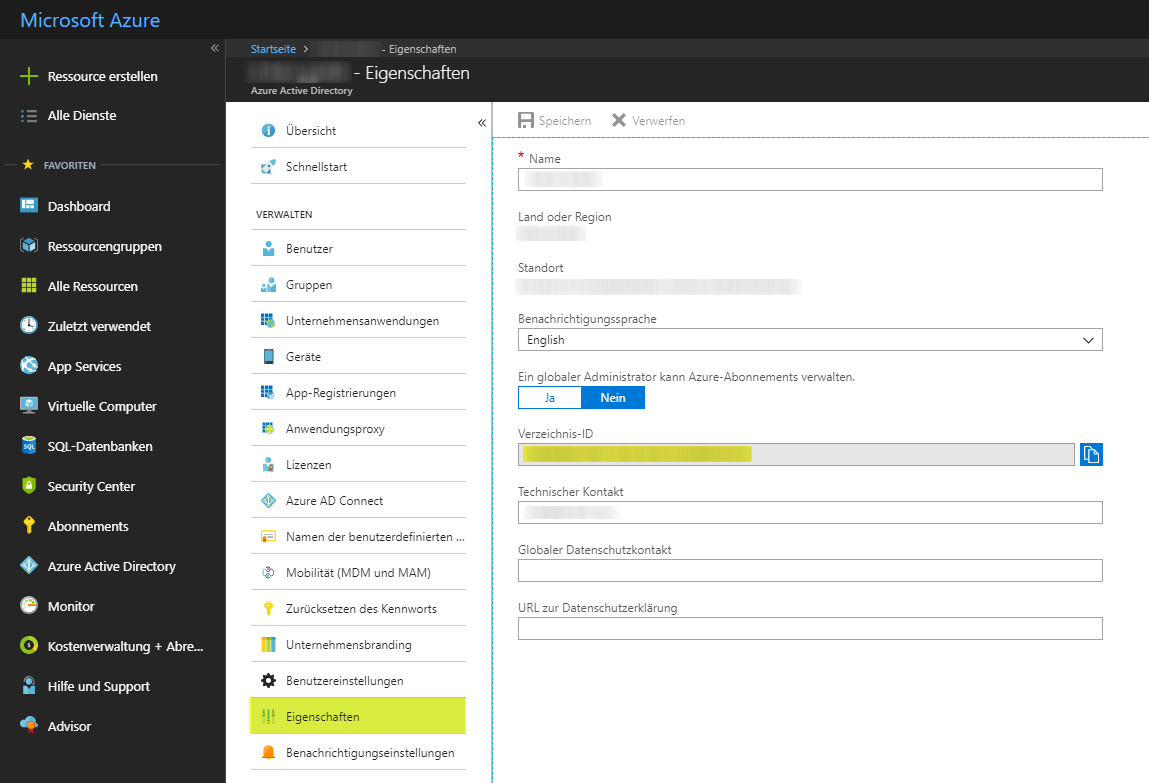
DIRECTORY_ID: The Id of the Azure AD, which can be found in the properties of the Azure AD (for an example see here)CLIENT_ID: The application Id, which can be found in the details of the corresponding application registration (for an example see here)REDIRECT_URI: The redirect URI entered during application registration
https://login.microsoftonline.com/DIRECTORY_ID/oauth2/authorize?client_id=CLIENT_ID&response_type=code&redirect_uri=REDIRECT_URI&response_mode=query
After calling the URI in a browser, you get redirected to the redirect URI, that contains the authorization code (see after ?code=).
Example
https://www.example.com?code=AUTHORIZATION_CODE&session_state=f2c9e4e0-b08a-4fd7-b098-af39fae159e4
Request Access Token using Authorization Code
The authorization code can now be used to request an OAuth2 access token as follows.
- Open PowerShell console
- Create request headers by pasting the following code snippet into the PowerShell console
$headers = @{
    "Content-Type" = "application/x-www-form-urlencoded"
};
- Create variable in PowerShell containing the authorization code
$authorizationCode = 'AUTHORIZATION_CODE_HERE';
- Create request body variable in PowerShell
Important: Replace the following placeholders in the URI
CLIENT_IDREDIRECT_URI (URL encoded)
$body = "grant_type=authorization_code&client_id=CLIENT_ID&code={0}&redirect_uri=REDIRECT_URI&resource=https%3A%2F%2Foutlook.office.com" -f $authorizationCode;
IMPORTANT: Resource has to be https://outlook.office.com to use the OAuth2 token for the Outlook REST API (https://outlook.office.com/api/v2.0/).
-
Execute the following request in PowerShell to obtain an OAuth2 access token
Important: Replace the following placeholders in the URI
$response = Invoke-RestMethod -Method Post -Uri "https://login.microsoftonline.com/DIRECTORY_ID/oauth2/token" -Body $body -Headers $headers;
$token = $response.access_token;
Office 365 API
The OAuth2 access token can be used to interact with the Office 365 REST API. As already mentioned in the introduction I tried out some features of the Outlook REST API, which is part of the Office 365 API. In the following sections I’ll provide PowerShell code to read and send messages and to read and create calendar events over the REST API.
The documentation of the Outlook REST API can be found here.
General
The root URI of the Outlook REST API looks as follows, where VERSION and USER_CONTEXT act as placeholders.
https://outlook.office.com/api/VERSION/USER_CONTEXT
Headers
To authenticate the requests against the API the OAuth2 access token requested above has to be included in request headers. Furthermore a x-AnchorMailbox header containing the user’s email address should be included in headers for optimal performance.
$bearerAuthHeader = "Bearer {0}" -f $token;
$headers = @{
    Authorization = $bearerAuthHeader;
    "x-AnchorMailbox" = "arbitrary.user@example.com"
};
Messages Endpoint
Outlook Mail REST API reference
Get Message Collection
Reading messages works as follows.
$uri = "https://outlook.office.com/api/v2.0/me/messages";
$messages = Invoke-RestMethod -Method Get -Uri $uri -Headers $headers;
Send Mail
For sending a message the following attributes have to be sent in POST request body.
$uri = "https://outlook.office.com/api/v2.0/me/sendmail";
$body = @{
    Message = @{
        Subject = "Arbitrary Subject";
        Body = @{
            ContentType = "Text";
            Content = "Text to be sent to the recipients"
        };
        ToRecipients = @(
            @{
                EmailAddress = @{
                    Address = "info@example.com";
                };
            }
        );
        Attachments = @()
    };
    SaveToSentItems = "false";
} | ConvertTo-Json -Depth 5;
$sendMsgResult = Invoke-RestMethod -Method Post -Uri $uri -Body $body -Headers $headers -ContentType "application/json";
Calendar Endpoint
Outlook Calendar REST API reference
Hint: For all operations that get calendar events the preferred timezone for start and end time can be specified using the following HTTP header.
Prefer: outlook.timezone="W. Europe Standard Time"
To get a list of all supported time zones see here.
Get Calendar Events by a time range from User’s primary Calendar
Reading calendar events from user’s primary calendar works as follows.
$uri = "https://outlook.office.com/api/v2.0/me/calendarview?startDateTime={0}&endDateTime={1}" -f "2018-04-10T01:00:00", "2018-04-30T01:00:00";
$events = Invoke-RestMethod -Method Get -Uri $uri -Headers $headers;
Get Calendar Events by a time range from a specific Calendar
First get all available calendars as follows.
$uri = "https://outlook.office.com/api/v2.0/me/calendars";
$calendars = Invoke-RestMethod -Method Get -Uri $uri -Headers $headers;
Now the events of a specific calendar can be requested as follows. Before doing so replace the ID_OF_THE_CALENDAR with the ID of the corresponding calendar.
$uri = "https://outlook.office.com/api/v2.0/me/calendars/{0}/calendarview?startDateTime={1}&endDateTime={2}" -f "ID_OF_THE_CALENDAR", "2018-04-05T01:00:00", "2018-04-30T01:00:00";
$events = Invoke-RestMethod -Method Get -Uri $uri -Headers $headers;
Add Calendar Event to a specific Calendar
For creating a calendar event the following attributes have to be sent in POST request body.
$uri = "https://outlook.office.com/api/v2.0/me/calendars/{0}/events" -f "ID_OF_THE_CALENDAR"
$body = @{
    Subject = "Arbitrary Event";
    Body = @{
        ContentType = "HTML";
        Content = "Text to describe the event"
    };
    Start = @{
        DateTime = "2018-04-09T16:00:00";
        TimeZone = "W. Europe Standard Time";
    };
    End = @{
        DateTime = "2018-04-09T17:00:00";
        TimeZone = "W. Europe Standard Time";
    };
    Attendees = @();
} | ConvertTo-Json -Depth 5;
$createEventResult = Invoke-RestMethod -Method Post -Uri $uri -Body $body -Headers $headers -ContentType "application/json";
Conclusion
With the Office365/Exchange 2016 REST API Microsoft offers a powerful way to manage Office 365 data over REST. The REST API is well documented and easy to use. Furthermore the documentation is well structured and I appreciate that all operations are illustrated with examples.


1 Comment »