C#/.NET
WPF Series -1- Project Setup
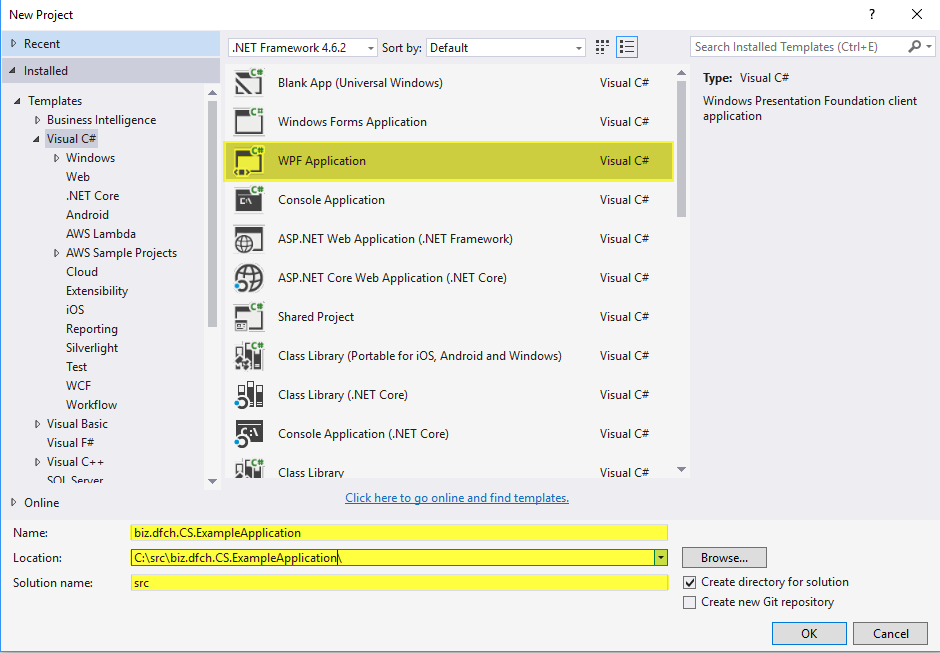
Before starting development we first had to set up a new WPF project. The projects target framework is .NET Framework 4.6.2 and we used Microsoft Visual Studio Community 2015 as […]
Audit and Consulting of Information Systems and Business Processes
Before starting development we first had to set up a new WPF project. The projects target framework is .NET Framework 4.6.2 and we used Microsoft Visual Studio Community 2015 as […]
Before starting development we first had to set up a new WPF project. The projects target framework is .NET Framework 4.6.2 and we used Microsoft Visual Studio Community 2015 as IDE. In this post I’ll quickly go through the necessary steps for setting up a WPF project at d-fens.
Microsoft Visual Studio Community 2015File > New > Project... in menu
Important:
Location has to match with the location the repository got cloned toSolution name to src (d-fens convention to shorten paths)Solution Explorer)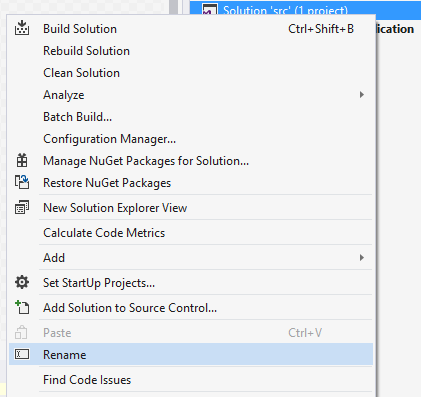
File > New > Project... in menu
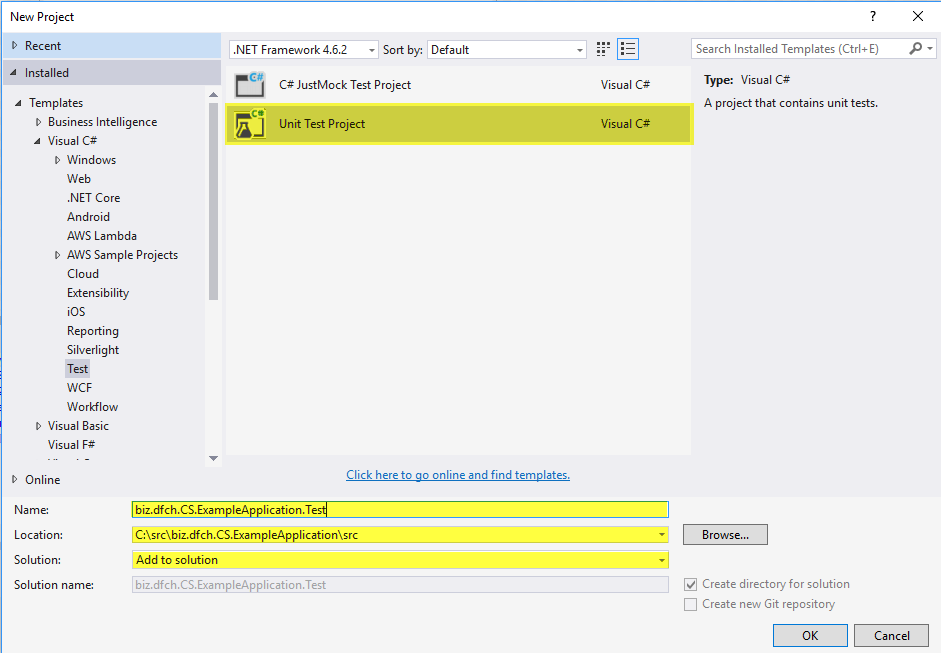
To simplify versioning a class called CommonAssemblySettings will be added to the solution that defines all AssemblyInfo annotations that are common across the solution. The CommonAssemblySettings.cs then gets linked to each project so that common annotations can be maintained in one place.
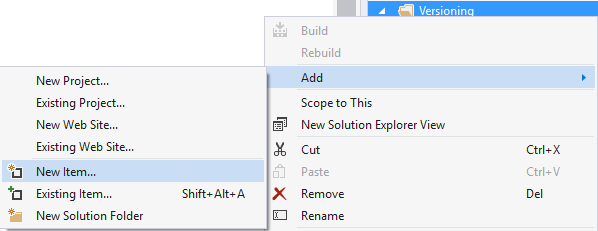
Versioning to the solution (right click on solution in Solution Explorer)
Add a C# class called CommonAssemblySettings to the Versioning folder
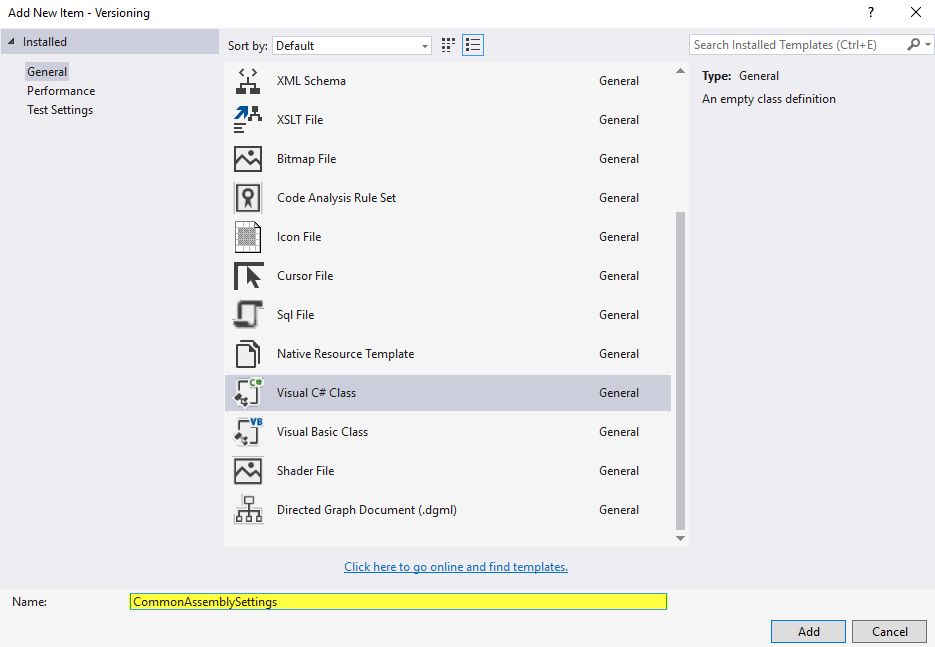
Replace the content of CommonAssemblySettings class with the following lines of code and replace the placeholders with meaningful content
using System.Reflection;
using System.Runtime.InteropServices;

// General Information about an assembly is controlled through the following
// set of attributes. Change these attribute values to modify the information
// associated with an assembly.
[assembly: AssemblyDescription("ASSEMBLY_DESCRIPTION")]
[assembly: AssemblyCompany("ASSEMBLY_COMPANY")]
[assembly: AssemblyCopyright("Copyright © 2017 ASSEMBLY_COMPANY")]
[assembly: AssemblyTrademark("")]
[assembly: AssemblyCulture("")]

// Setting ComVisible to false makes the types in this assembly not visible
// to COM components.  If you need to access a type in this assembly from
// COM, set the ComVisible attribute to true on that type.
[assembly: ComVisible(false)]

[assembly: AssemblyVersion("1.0.0.0")]
CommonAssemblySettings.cs file to every project in the solution (right click on project in Solution Explorer)


Properties of the corresponding projectAssemblyInfo.cs file that are already specified in CommonAssemblySettings.csPrerequisites:
Activate code contracts on all projects in the solution.
Solution Explorer > PropertiesCode Contracts tab and apply the same configuration as in the following screenshot
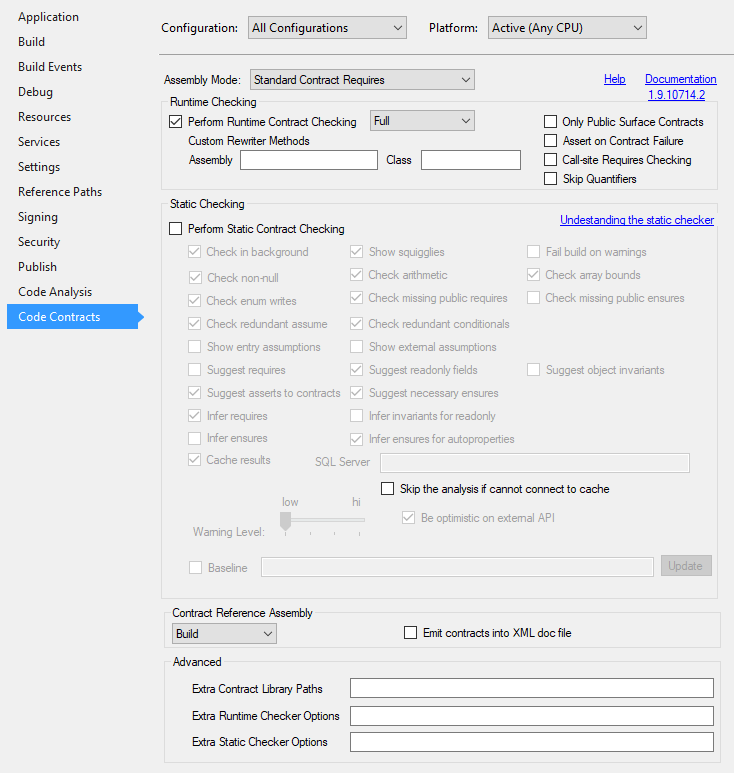
Important: Select All Configurations first
For logging we use our self developed logging classes from Diagnostics namespace of biz.dfch.CS.Commons. These logging classes are based on System.Diagnostics and the advantage of them is, that they abstract the underlying logging framework. You can use biz.dfch.CS.Commons for example in combination with log4net or any other supported logging framework. To configure logging the before mentioned libraries have to be installed first by executing the following commands in Package Manager Console of Visual Studio.
Install-Package biz.dfch.CS.CommonsInstall-Package log4netNow the logging libraries need to be configured. First log4net gets configured by adding a file called log4net.config to the project. The log4net.config for example looks as follows. However you can configure log4net according your needs.
<?xml version="1.0" encoding="utf-8" ?>
<configuration>
  <configSections>
    <section name="log4net" type="log4net.Config.Log4NetConfigurationSectionHandler, log4net" />
  </configSections>
  <log4net>
    <!--Define some output appenders-->
    <appender name="RollingLogFileAppender" type="log4net.Appender.RollingFileAppender">
      <file value="C:\Logs\ExampleApplication.log4net.log" />
      <appendToFile value="true" />
      <maxSizeRollBackups value="10" />
      <maximumFileSize value="1GB" />
      <rollingStyle value="Size" />
      <staticLogFileName value="true" />
      <layout type="log4net.Layout.PatternLayout">
        <header value="[Application START]" />
        <footer value="[Application STOP]" />
        <conversionPattern value="%date [%thread] %level %message%newline" />
      </layout>
    </appender>

    <!--Setup the root category, add the appenders and set the default level-->
    <root>
      <level value="ALL" />
      <appender-ref ref="RollingLogFileAppender" />
    </root>
  </log4net>
</configuration>
Last but not least the TraceSources, Switches and Listeners of System.Diagnostics have to be configured in App.config so that the logging classes from biz.dfch.CS.Commons, which are based on System.Diagnostics, work as expected.
<?xml version="1.0" encoding="utf-8" ?>
<configuration>

  ...

  <system.diagnostics>
    <sources>
      <source name="TRACE_SOURCE_NAME" switchName="SourceSwitchAll">
        <listeners>
          <add name="Log4NetTraceListenerWithFilter"/>
        </listeners>
      </source>
    </sources>
    <switches>
      <add name="SourceSwitchOff" value="Off"/>
      <add name="SourceSwitchError" value="Error"/>
      <add name="SourceSwitchWarning" value="Warning"/>
      <add name="SourceSwitchInfo" value="Info"/>
      <add name="SourceSwitchVerbose" value="Verbose"/>
      <add name="SourceSwitchAll" value="All"/>
    </switches>
    <sharedListeners>
      <add name="Log4NetTraceListenerWithFilter"
           type="biz.dfch.CS.Commons.Diagnostics.Log4NetTraceListener, biz.dfch.CS.Commons, PublicKeyToken=ddc350d26de1d0d9"
           initializeData="log4net.config" >
        <filter type="System.Diagnostics.EventTypeFilter" initializeData="All" />
      </add>
    </sharedListeners>
    <trace autoflush="false" indentsize="4">
      <listeners>
        <add name="Log4NetTraceListenerWithFilter"
             type="biz.dfch.CS.Commons.Diagnostics.Log4NetTraceListener, biz.dfch.CS.Commons, PublicKeyToken=ddc350d26de1d0d9"
             initializeData="TRACE" />
      </listeners>
    </trace>
  </system.diagnostics>
</configuration>
Important: Replace TRACE_SOURCE_NAME with a meaningful name
Now if you log to the specified TraceSource the log messages get processed by log4net based on log4net.config.
Logger.Get("TRACE_SOURCE_NAME").TraceEvent(TraceEventType.Information, (int.MaxValue - 1), "Arbitrary log message");
After completing all the above mentioned steps the project setup is done and we can start coding…
| « WPF Series – Introduction | WPF Series -2- WPF Application Design » |

2 Comments »